Introduction
In the dynamic world of web design, user interaction is paramount. One effective way to enhance user engagement on your website is by incorporating buttons with clickable links. In this article, we’ll explore the process of adding a link to a button using Divi Builder, a popular and user-friendly WordPress page builder.
Why Linking Buttons Matter
Before delving into the “how,” let’s briefly discuss the “why.” Linking buttons can significantly improve user experience by providing a clear and direct path for visitors to navigate through your website. Whether it’s guiding them to a product page, a contact form, or an external resource, linked buttons facilitate seamless navigation.
Getting Started with Divi Builder
1. Install and Activate Divi Builder
Begin by ensuring that Divi Builder is installed and activated on your WordPress site. If not, navigate to your WordPress dashboard, go to Plugins > Add New, search for Divi Builder, and install it.
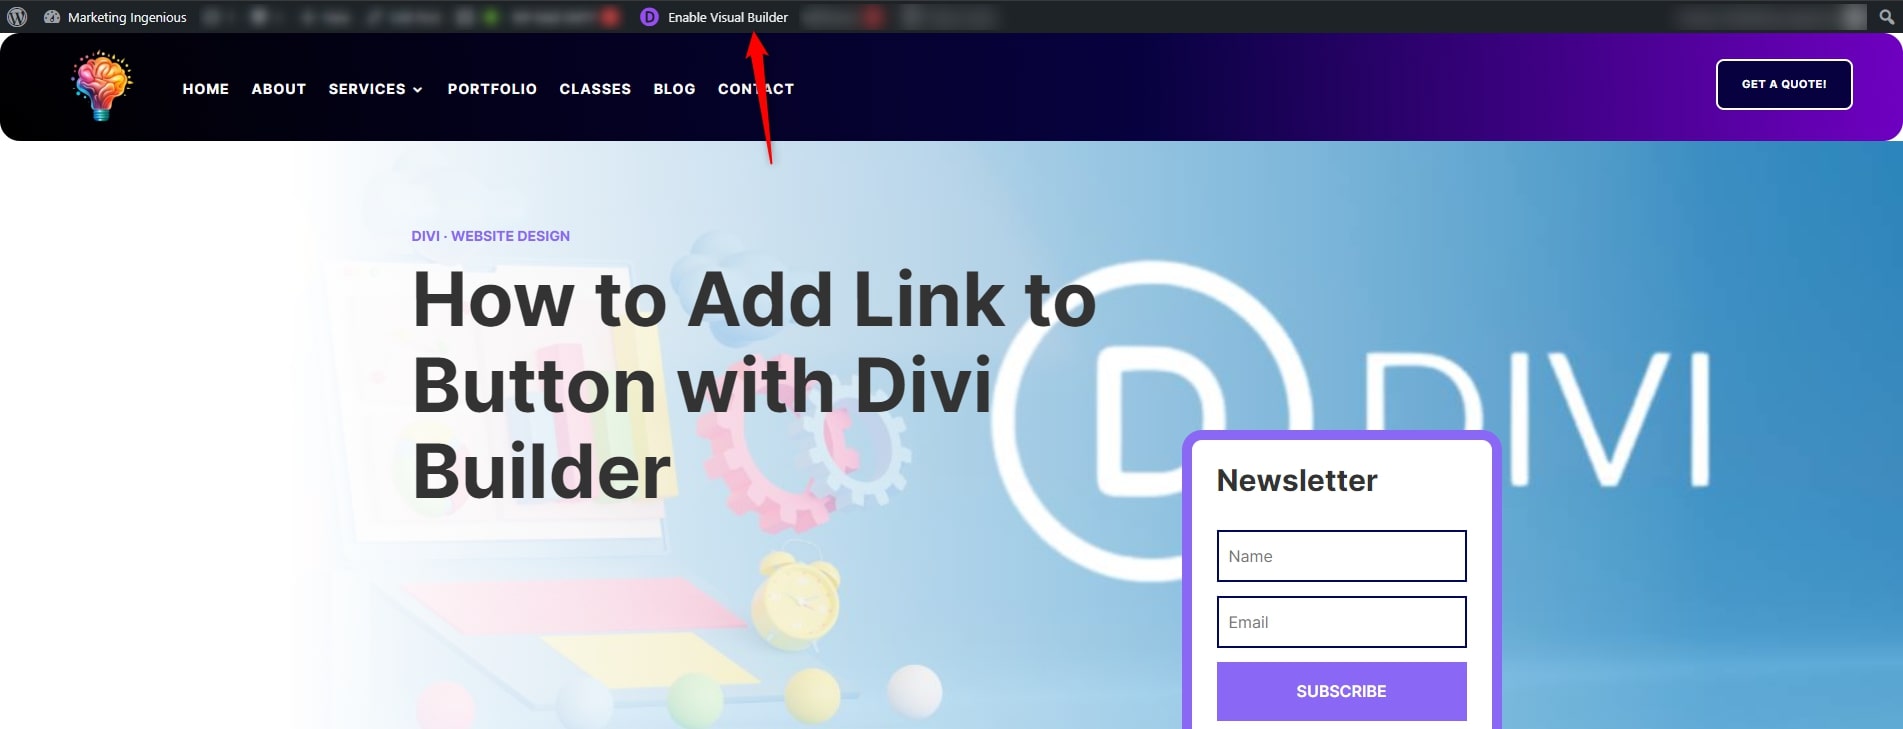
You may have installed the Divi Theme by going to Appearance > Add New Theme, then the visual builder should already be activated, even if you don’t see the plugin mentioned above in your installed and activated plugin list.
2. Create or Edit a Page with Divi Builder
Once Divi Builder is active, either create a new page or edit an existing one using the Divi Builder. This will open the intuitive drag-and-drop editor.
Adding a Button Module
3. Locate the Button Module
Within the Divi Builder editor, find the place on your page where you want to add the linked button. Click the “+” button to add a new module, and search for the “Button” module.

4. Customize Your Button
After adding the Button module, you’ll be prompted to customize its appearance and content. Add your desired text, choose a style, and adjust the size to suit your design preferences.
Adding the Link
5. Locate the Link Option
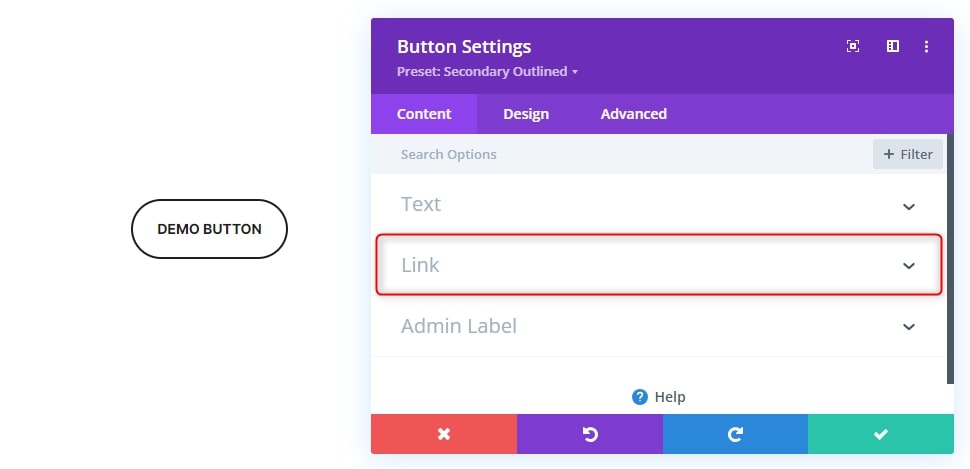
Scroll down within the Button module settings until you find the “Link” option. Here, you’ll be able to input the URL you want the button to link to.
6. Input the URL
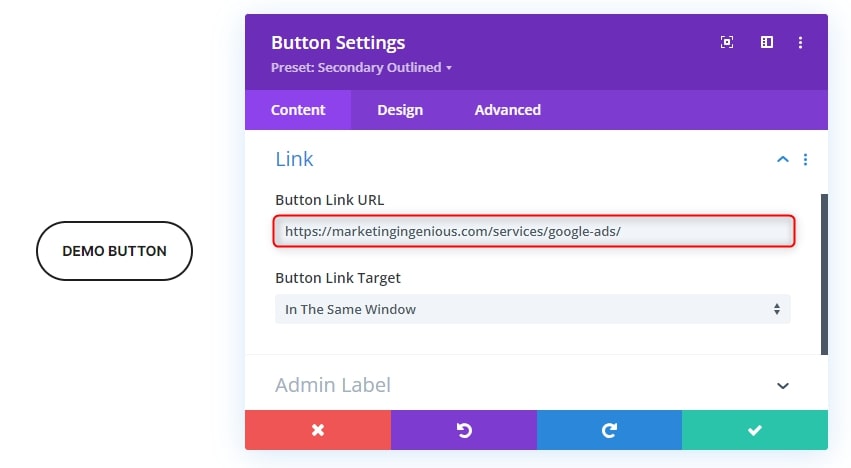
Simply paste the URL into the designated field. Ensure the link is accurate and leads to the intended destination.
In that case I copied and pasted the link to a page of my website > Google Ads Services.
7. Additional Settings
Explore additional settings such as link opening behavior (in the same window or a new tab) and custom CSS styling if needed.
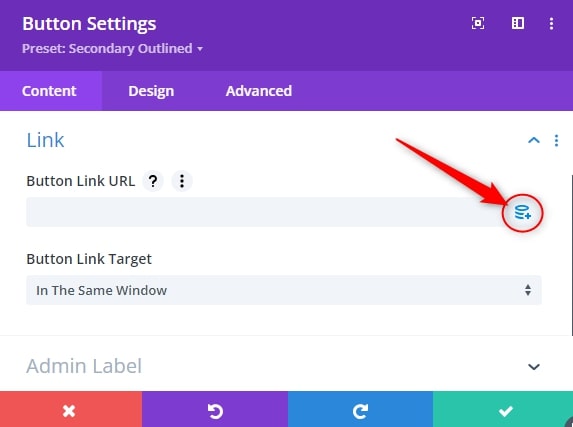
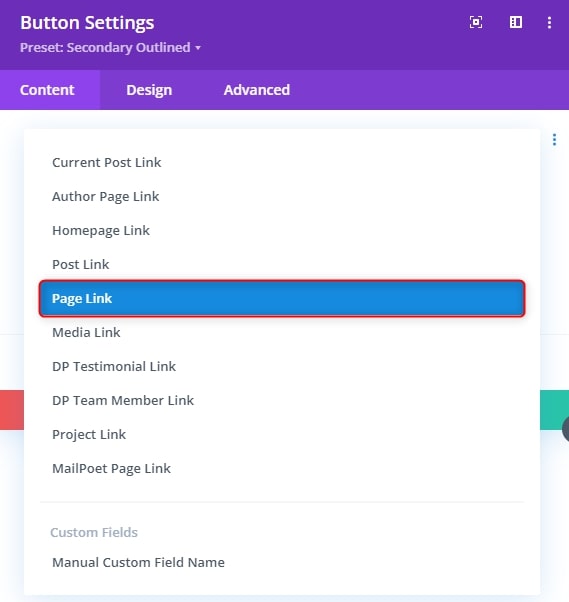
More importantly, you can also add dynamic link to your button. To do so, you need to click the little stacked icon on the right of the link field, it will then open various options of dynamic link; You can for example decide to add one of your website’s pages as a link, without typing it all manually. However, the page you are trying to link dynamically needs to be “Published”, otherwive you won’t find it in the list.
Preview and Save
8. Preview Your Page
Before finalizing, take advantage of the Divi Builder’s preview feature to ensure your button functions as expected.
9. Save Your Changes
Once satisfied with your linked button, click the “Save” button to preserve your changes.
Conclusion
Incorporating linked buttons with Divi Builder is a straightforward process that can significantly enhance your website’s user experience. By following these simple steps, you can create buttons that seamlessly guide visitors through your site.

